
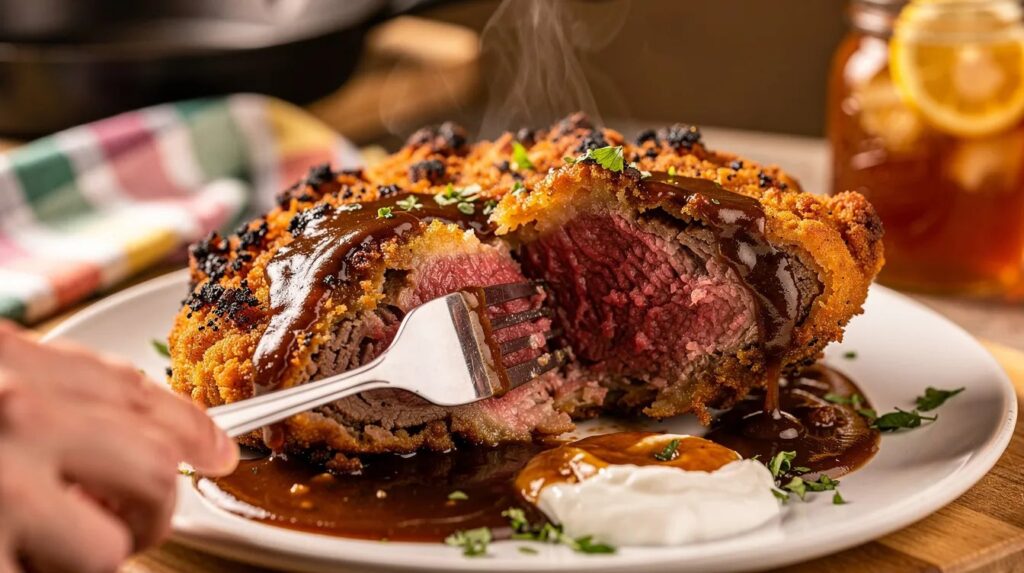
Spring is arriving across the South, and with it comes that particular craving for the kind of food that feels like a warm handshake from someone who really means it. Chicken fried steak — that gloriously battered, pan-fried cut of tenderized beef blanketed in peppery cream gravy — has been anchoring American tables for well over a century. It is the kind of dish that looks simple on the surface yet hides an astonishing amount of technique inside every crunch. The difference between a forgettable version and one that genuinely stops conversation? Deliberate choices made by the cook.
This guide walks through ten concrete, tested techniques that elevate chicken fried steak, making it so good that people ask for it by name. Whether you are feeding a crowd over the Easter weekend or simply treating yourself to a slow Sunday lunch, these adjustments work at every level of experience. Tie on an apron, pull out your cast iron, and let's get to work.
| Prep Time | 25 min |
| Cook Time | 20 min |
| Rest | 10 min |
| Servings | 4 people |
| Difficulty | Medium |
| Cost | $$ |
| Season | Year-round · Spring herbs (chives, parsley) recommended for garnish |
Start with the right cut — then pound it properly
The most common mistake begins at the butcher counter. Cube steak — already mechanically tenderized, meaning it has been run through a blade machine — is the traditional choice, but the real upgrade comes from selecting a top round or bottom round and pounding it yourself. Place the steak between two sheets of plastic wrap and use the spiked side of a meat mallet to break down the muscle fibers, working from the center outward in overlapping strikes. You are aiming for a thickness of roughly ¼ inch. This extra step not only produces a more even surface for the crust to cling to but also creates a tenderness that pre-processed cube steak rarely matches. The sound changes as you work — initially a dull thud, then a flat, almost papery impact that tells you the fibers have given way.
Build a proper seasoning foundation
The steak itself needs seasoning long before it meets the breading. Dust both sides generously with kosher salt and freshly cracked black pepper, then let it rest at room temperature for at least 15 minutes. This brief dry-brine period draws moisture to the surface and then back in, carrying the seasoning into the meat rather than leaving it sitting on top. For a deeper profile, add garlic powder, smoked paprika, and a pinch of cayenne to the salt-and-pepper base. The cayenne will not make the finished steak spicy — it simply adds a quiet warmth that rounds out the richness of the cream gravy.
Use a three-stage dredge with buttermilk
A single pass through flour produces a thin, fragile crust. The professional approach uses three distinct stages: seasoned flour, a buttermilk-egg wash, and seasoned flour again. Press the steak firmly into the first flour coating so it adheres completely. In the buttermilk wash — one cup of buttermilk beaten with one egg — the moisture rehydrates the flour on the surface, creating a paste that grips the second layer of flour with real conviction. Press firmly again in that final flour coating, then set the breaded steaks on a wire rack for 10 minutes before frying. This rest period, often skipped, allows the coating to hydrate and bind so it does not slide off the moment it hits hot oil.
Add cornstarch to your flour
Replace one quarter of the all-purpose flour in your dredge with cornstarch. This single substitution produces a crust that is noticeably crisper and maintains that texture even as the gravy approaches — which is exactly when most crusts surrender. The cornstarch inhibits gluten development, keeping the coating light and shatteringly crisp rather than chewy. Some cooks in Texas hill country kitchens add a teaspoon of baking powder alongside the cornstarch, which introduces tiny air pockets during frying and pushes the crust toward something closer to a tempura-style shatter.
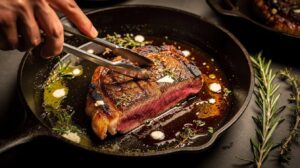
Control your oil temperature with precision
Chicken fried steak is shallow-fried, not deep-fried, but the oil temperature matters just as much. Heat ¾ inch of vegetable shortening or a neutral oil with a high smoke point — refined peanut oil works well — in a cast iron skillet to 350°F (175°C). Use a clip-on thermometer rather than guessing. Too cool and the crust absorbs oil, turning greasy and soft before the beef finishes cooking. Too hot and the exterior burns before the interior reaches the correct temperature. Fry the steaks in batches, never crowding the pan — overcrowding drops the oil temperature sharply and steams the crust rather than crisping it. Two to three minutes per side produces a crust that is deep amber, dry to the touch, and audibly crisp when pressed.
Rest on a wire rack, never paper towels
Paper towels are the enemy of crisp crusts. When the fried steak rests flat against an absorbent surface, steam from the hot meat condenses directly back into the crust and softens it within minutes. Instead, transfer the cooked steaks to a wire rack set over a sheet pan and slide the whole setup into an oven set to 200°F (95°C). This holds the steaks at temperature while you cook subsequent batches and allows steam to escape freely on all sides. The crust you worked for stays intact.
Make the gravy from the pan drippings — all of them
The cream gravy is not an afterthought. Pour off most of the frying oil, leaving behind 3 tablespoons of the drippings along with all the browned bits clinging to the bottom of the pan. Those bits — called fond — are concentrated, caramelized flavor. Whisk in 3 tablespoons of all-purpose flour and cook the roux over medium heat, stirring constantly, for 90 seconds until it smells faintly of toasted nuts and turns a pale tan color. Slowly pour in 2 cups of whole milk, whisking continuously to prevent lumps. The gravy needs black pepper — a lot of it — plus salt and a small pinch of the same cayenne used in the seasoning. A proper white pepper gravy has visible flecks of pepper throughout and a consistency thick enough to coat the back of a spoon without running.
Season the gravy in layers
Many cooks season only at the end, which produces flat, underdeveloped gravy. Season the roux as it cooks. Season the milk as it goes in. Then taste and adjust at the very end. This layered seasoning approach builds complexity the way time and heat build flavor — gradually and thoroughly. A small splash of Worcestershire sauce added to the gravy just before serving introduces an umami depth that makes the whole dish taste more complete without drawing attention to itself.
Upgrade with fresh herbs in spring
March brings the first reliable wave of fresh herbs to markets across the South. Fold a generous tablespoon of freshly chopped flat-leaf parsley into the finished gravy just before plating — it cuts through the richness and adds a green, faintly bitter note that prevents the dish from feeling heavy. A small scatter of fresh chives over the finished plate adds color and a mild onion brightness. Neither herb dominates; together, they signal that this is a dish that has been thought about.
Let the diner pour their own gravy
Serve the gravy in a warm pitcher on the side rather than ladled directly over the steak at the stove. This preserves the crust for those extra seconds between kitchen and table and, more practically, lets each person decide how much gravy they want — which is, in practice, considerably more than you would pour for them. A steak arriving at the table still audibly crisp, with a pitcher of steaming gravy beside it, creates a moment before the meal that most recipes never account for.
My chef's note
The single most impactful thing most home cooks can do is chill the breaded, rested steaks in the refrigerator for 20 minutes before they fry. The cold firms the coating, and the thermal shock when it hits hot oil creates a faster, more aggressive crust. In spring, when kitchens are still cool and unhurried, this step costs almost nothing and returns everything. Try it once and it becomes permanent habit.
Pairing suggestions
Chicken fried steak carries a bold, savory profile — rich beef, fat from frying, and the deep pepper-cream of the gravy — that calls for drinks built on contrast rather than matching weight.
A well-chilled American lager or a crisp Texas-brewed pilsner cuts through the fat cleanly and refreshes the palate between bites. If wine is preferred, a moderately chilled Beaujolais-Villages — light-bodied, fruit-forward, with low tannins — works surprisingly well, its bright acidity balancing the richness without competing. For a non-alcoholic option, unsweetened iced tea with a squeeze of fresh lemon is the classic Southern pairing for a reason: it is cold, slightly astringent, and never argues with the food.
The story behind chicken fried steak
Chicken fried steak is not chicken — the name refers to the method, not the protein. The dish is cooked exactly as you would fry a piece of chicken: dredged, battered, and pan-fried in oil. The technique arrived in Texas and Oklahoma with Central European immigrants in the mid-19th century, who applied their tradition of Wiener Schnitzel — tenderized, breaded veal — to the tougher, less expensive beef cuts available on the American frontier. By the early 20th century, the dish had taken on its own distinct identity, the cream gravy replacing the lemon-and-caper traditions of Central Europe entirely.
Today, chicken fried steak appears across the American South and Midwest with regional variations that can be fierce points of local pride. In some parts of Texas, the gravy runs white and assertively peppery. In Oklahoma, some cooks use a brown gravy instead. A handful of restaurants across the country serve versions with jalapeños folded into the crust, or topped with pickled onions as a nod to modern Southern cooking. The traditional preparation, however, remains largely unchanged — which is perhaps the best argument for making it exactly right.
Nutritional information (per serving, approximate values)
| Nutrient | Amount |
|---|---|
| Calories | ~620 kcal |
| Protein | ~38 g |
| Carbohydrates | ~42 g |
| of which sugars | ~6 g |
| Fat | ~32 g |
| Fiber | ~2 g |
Frequently asked questions
Can chicken fried steak be made ahead of time?
The steaks can be breaded up to 8 hours in advance and held uncovered on a wire rack in the refrigerator — the cold air actually helps set the coating. Fry them fresh when you are ready to eat, as the crust does not survive reheating well enough to justify cooking them ahead. The gravy, however, reheats beautifully over low heat with a splash of milk whisked in to loosen it.
How do you store and reheat leftovers?
Store leftover steaks and gravy separately in airtight containers in the refrigerator for up to 3 days. To reheat the steak, place it on a wire rack over a sheet pan in a 375°F (190°C) oven for 12 to 15 minutes — this restores a meaningful amount of crust crispness. A microwave will reheat the beef but turns the crust soft and dense. Reheat gravy in a small saucepan over low heat, whisking in a tablespoon or two of milk as needed.
What substitutions work if buttermilk is unavailable?
Pour 1 tablespoon of white vinegar or fresh lemon juice into a measuring cup, then fill to the 1-cup line with whole milk. Stir briefly and let it sit for 5 minutes — the milk will curdle slightly, producing a functional buttermilk substitute with similar acidity and tenderizing properties. Plain full-fat yogurt thinned with a small amount of milk also works and produces a slightly thicker coating with a faint tang.
Can this be made with chicken instead of beef?
Yes — pounded boneless, skinless chicken breasts or thighs follow the exact same technique with one adjustment: the internal temperature should reach 165°F (74°C) rather than the 145°F target for beef. The cream gravy is identical. Many Southern diners serve both on the same menu under different names, and the method is genuinely interchangeable.
Why does my crust fall off during frying?
The two most common causes are skipping the resting step after breading and using oil that is not hot enough. The rest — at least 10 minutes on a wire rack, or up to 20 minutes chilled — allows the coating to bond to the meat surface before it meets heat. Oil that is too cool (below 325°F / 163°C) causes the coating to absorb fat and loosen before it has time to set. A thermometer eliminates the guesswork entirely.