
Late March light in California has a particular quality — long enough to feel like summer is within reach, soft enough to remind you winter isn't entirely gone. It's the kind of afternoon that calls for a dessert that looks far more complicated than it is: a pavlova, that cloud-like meringue shell with a crisp exterior and a marshmallow heart, crowned with something bright and seasonal. This version comes from a baker who grew up making pavlova in Melbourne and never stopped, even after trading the Southern Hemisphere autumn for a California spring. She taught me that the whole thing rests on four ingredients, correctly handled.
Pavlova has long been a point of pride in Australian kitchens, and with good reason — the contrast between the shatteringly thin outer shell and the sticky, yielding interior is unlike anything else in pastry. This particular recipe is worth your attention because of its discipline: no cornstarch, no cream of tartar, no vinegar. Just egg whites, sugar, vanilla, and lemon juice. The restraint forces you to pay attention to technique, which is where all the magic actually happens. If you've ever ended up with a flat, weeping meringue, the steps below will tell you exactly why — and exactly how to avoid it. Tie on your apron.
| Preparation | 25 min |
| Baking | 1 hr 15 min |
| Resting | 2 hr (in oven, door ajar) |
| Servings | 6–8 people |
| Difficulty | Medium |
| Cost | $ |
| Season | Spring strawberries, passion fruit, kiwi |
Suitable for: Vegetarian · Gluten-free · Dairy-free
Ingredients
For the meringue base
- 4 large egg whites, at room temperature (from eggs aged at least 3 days)
- 1 cup (200 g) superfine sugar (caster sugar), measured exactly
- 1 tsp pure vanilla extract (not imitation)
- 1 tsp fresh lemon juice
For the topping (seasonal suggestions)
- 1 cup (240 ml) heavy whipping cream, whipped to soft peaks
- 1 punnet (250 g) fresh spring strawberries, hulled and halved
- 2 passion fruits, pulp scooped
- A few fresh mint leaves, to finish
Equipment
- Stand mixer or hand mixer with a whisk attachment
- Large, completely grease-free metal or glass mixing bowl
- Baking sheet
- Parchment paper
- Pencil and a round plate (approximately 8 inches / 20 cm) for tracing
- Rubber spatula
- Fine-mesh sieve (for checking sugar dissolution)
Preparation
1. Set up your environment before you begin
Preheat your oven to 250°F (120°C) — not a degree more. Pavlova is not baked in the conventional sense; it is dried, slowly, at a temperature barely above what you'd use to keep food warm. While the oven heats, trace an 8-inch (20 cm) circle on a sheet of parchment paper using a plate and a pencil. Flip the parchment over and place it on your baking sheet, pencil-side down — you'll still see the guideline through the paper. This matters: pencil graphite should never touch your meringue. Wipe your mixing bowl and whisk attachment with a paper towel dampened with a small amount of white vinegar, then let them air-dry completely. Any trace of fat — even a fingerprint — will prevent your egg whites from reaching their full volume.
2. Bring your egg whites to temperature
If your eggs came straight from the refrigerator, set them on the counter for at least 30 minutes before separating them. Room-temperature egg whites whip more readily and achieve greater volume than cold ones; the protein network is more elastic and responds better to the incorporation of air. Separate each egg one at a time into a small bowl before adding to the mixing bowl — this way, a broken yolk doesn't contaminate the entire batch. A single drop of yolk contains enough fat to deflate your meringue entirely. Discard any whites that show even a trace of yolk.
3. Whip the egg whites to stiff peaks
Begin whipping the egg whites on medium speed — a moderate pace that builds a stable foam with uniform bubbles. If you go too fast too soon, you create large, fragile air pockets that collapse during baking. After about 2–3 minutes, the whites will be foamy and opaque but still loose. Increase the speed to medium-high and continue until the whites reach stiff peaks — when you lift the whisk, the meringue holds a peak that stands straight up without drooping. At this stage, the mixture is bright white and has the visual quality of shaving cream, with a faint squeak against the bowl.
4. Add the sugar, one tablespoon at a time
This step takes patience — and patience is what separates a smooth, glossy meringue from a grainy, weeping one. With the mixer still running on medium-high, add the superfine sugar one tablespoon at a time, waiting about 20 seconds between each addition. The slow incorporation allows the sugar to dissolve fully into the egg whites rather than sitting in undissolved crystals. After all the sugar has been added, continue beating for a further 4–5 minutes. To check that the sugar has dissolved, rub a small amount of meringue between your thumb and index finger — you should feel absolutely no graininess. If you do, keep beating.
5. Fold in the vanilla and lemon juice
Remove the bowl from the mixer. Add the vanilla extract and the lemon juice directly onto the meringue. Using a large rubber spatula, fold these in with broad, deliberate strokes — not a stirring motion. The lemon juice acts as a mild acid that stabilizes the protein structure and helps the pavlova hold its shape during baking, functioning the same way cream of tartar would in a more complex recipe. Fold only until the vanilla and lemon juice are fully incorporated. Overworking the meringue at this stage will begin to deflate it.
6. Shape and bake
Spoon the meringue onto the prepared parchment, keeping it within the traced circle. Using the back of a spoon, build up the sides slightly higher than the center, creating a shallow well — this depression is where your cream and fruit will eventually sit. The edges can be as rustic or as refined as you like; the Australian baker's version had deliberately rough, cliff-like edges that turned a deep ivory during baking. Slide the sheet into the oven and bake at 250°F (120°C) for 1 hour and 15 minutes. The pavlova is ready when the exterior is dry and firm to a very gentle touch, the color has shifted from white to the palest cream, and it lifts cleanly from the parchment.
7. Cool in the oven with the door ajar
Turn the oven off. Open the door and prop it ajar with a wooden spoon. Leave the pavlova inside for at least 2 hours, or overnight if you're preparing ahead. This slow cooling is not optional — a sudden drop in temperature causes the steam trapped inside the meringue to expand rapidly, cracking the shell dramatically or causing it to collapse inward. Small surface cracks are normal and add to the rustic appeal of the dessert; a major collapse is a different matter entirely and is almost always caused by removing the pavlova from the oven too quickly.
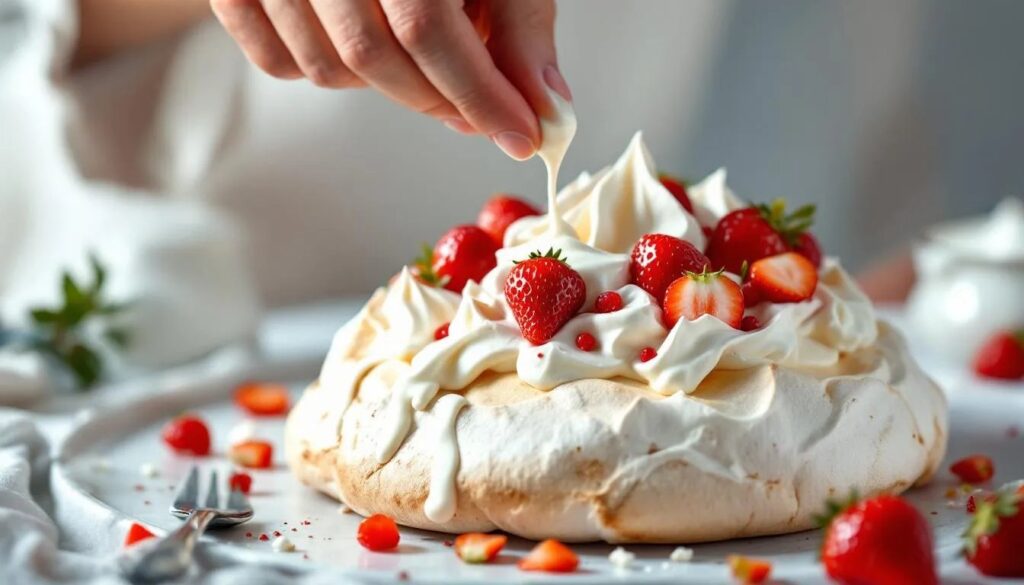
8. Top and serve
Transfer the cooled pavlova to a serving plate or cake stand. Spoon the whipped cream into the central well and spread it gently to the edges. Arrange the halved spring strawberries over the cream, then spoon the passion fruit pulp over everything — its tartness and the small dark seeds create a striking contrast against the pale meringue. Finish with a few torn mint leaves. Serve within 1–2 hours of topping; beyond that, the cream begins to soften the meringue shell.
My baker's tip
The single most reliable way to ensure a marshmallow-soft center is to slightly underbake the pavlova — by a few minutes — and trust the cooling process to finish the job. When you tap the top of the shell and it sounds hollow, and the surface feels completely dry, you are done. If you're baking in spring or early summer and the air is humid, add 5 extra minutes to the baking time; humidity is the enemy of meringue and will keep the surface tacky well past the usual baking window. In California's dry March heat, the standard 75 minutes is almost always enough.
Drinks & pairings
Pavlova occupies that interesting territory between delicate and intensely sweet — the meringue itself is pure sugar, while the cream and fresh fruit provide acidity and freshness. The right pairing amplifies the fruit rather than fighting the sweetness.
A glass of Moscato d'Asti from Piedmont works with particular elegance — its low alcohol, gentle effervescence, and peach-and-apricot aromatics play against the strawberry without overwhelming the meringue. A California late-harvest Riesling from the Sierra Foothills is a more local option, with enough acidity to cut through the cream. For a non-alcoholic pairing, a sparkling white tea with a squeeze of fresh lime over ice does the job well, carrying enough tannin to balance the sweetness without bitterness.
The story behind pavlova
Few desserts have sparked as much diplomatic culinary dispute as the pavlova. Both Australia and New Zealand claim its invention, and neither shows any signs of conceding. The dessert was created in honor of the Russian ballerina Anna Pavlova during one of her tours of Australasia in the late 1920s, the exact year and location still contested by food historians on both sides of the Tasman Sea. What is agreed upon is that the light, airy structure of the meringue was meant to evoke the tutu and the ethereal quality of Pavlova's dancing.
In Australian households, pavlova has become the default centrepiece of warm-weather celebrations — Christmas in December coincides with the height of summer in the Southern Hemisphere, and a pavlova loaded with strawberries, kiwi, and passionfruit has been the traditional Christmas dessert in many families for generations. When Australians move north, to London or Los Angeles, they bring the habit with them — and the dish simply migrates through the calendar. A March pavlova, made for the first warm weekend of a California spring, isn't an adaptation. It is a faithful translation.
Nutritional values (per serving, approximate values)
| Nutrient | Amount |
|---|---|
| Calories | ~310 kcal |
| Protein | ~4 g |
| Carbohydrates | ~48 g |
| of which sugars | ~46 g |
| Fat | ~12 g |
| Fiber | ~1 g |
Frequently asked questions
Can i make the pavlova base ahead of time?
The meringue base is actually better made the day before. Once fully cooled in the oven, store it in an airtight container at room temperature — not in the refrigerator, where moisture will soften the shell rapidly. In dry climates like most of California in spring, a well-sealed pavlova base will keep beautifully for up to 48 hours. Only add the cream and fruit toppings within 1–2 hours of serving.
How do i store leftovers?
Once topped, pavlova does not store well — the cream and fruit release moisture that softens the meringue into a sticky, collapsed mass overnight. If you anticipate leftovers, keep extra cream and fruit on the side and top individual portions to order. The undressed meringue base can be stored in an airtight container for up to 2 days. Topped leftovers, if unavoidable, can be refrigerated and eaten within 24 hours; the texture will be softer but the flavor remains good.
What fruit substitutions work well in spring?
Late March in California puts early strawberries and citrus in peak form — blood oranges are at the tail end of their season and make a striking visual statement against the cream. As April approaches, rhubarb becomes a compelling option: roast it briefly with a little sugar and orange zest, let it cool completely, and spoon it over the cream for a tart, jewel-toned contrast. Kiwi fruit and mango both work year-round and are classics in the Australian tradition. Avoid very watery fruits like watermelon, which will pool on the cream and seep into the meringue.
Why did my pavlova crack or collapse?
Surface cracking is normal and part of the charm — do not be alarmed by it. A significant collapse is almost always caused by one of two things: removing the pavlova from the oven while it is still warm, or undissolved sugar creating pockets of moisture inside the meringue. To avoid the first, always cool in the oven with the door ajar for a minimum of two hours. To avoid the second, add the sugar very slowly and test for graininess between your fingers before shaping. A third less common cause is fat contamination in the bowl or on the whisk — even a small amount prevents the egg whites from building the protein network necessary to hold their structure.
Can i make individual pavlovas instead of one large one?
Individual nests are an excellent alternative — they bake more evenly and are easier to serve at dinner parties. Use a spoon or piping bag to form rounds approximately 3–4 inches (8–10 cm) in diameter on the parchment, with the same raised edges and central well. Reduce the baking time to 50–60 minutes at the same temperature of 250°F (120°C), and apply the same rule for cooling slowly in the oven. Individual pavlovas can also be topped to order, which eliminates the storage problem entirely.