


There's a moment every Easter—or maybe it's a summer cookout, or a holiday potluck—when someone sets down a tray of deviled eggs and you take one, expecting that specific, almost muscle-memory satisfaction, and instead you taste something that's just… fine. Creamy, yes. Technically correct, perhaps. But not that. Not the version that used to disappear in under three minutes at your grandmother's table, the one that left a faint yellow smear on the platter before the main course was even carved. Something is missing, and it's not just nostalgia playing tricks on your palate.
According to food historians who specialize in mid-century American cooking, that gap between then and now is entirely real—and entirely explainable. The ingredients have changed. The techniques have been quietly abandoned. The shortcuts we reach for in 2026 are, in many cases, the precise reasons our deviled eggs fall short. Learn what your grandmother actually knew, what she was working with, and how a few deliberate choices in your own kitchen can close that gap for good. Spring is here, eggs are at their seasonal best, and it's time to get this right.
| Preparation | 25 min |
| Cooking | 12 min |
| Rest | 30 min (chilling) |
| Portions | 12 deviled egg halves (6 servings) |
| Difficulty | Easy |
| Cost | $ |
| Season | Spring eggs, fresh chives, early radishes |
Suitable for: Gluten-free · High protein
What the retro food historian actually found
Research into mid-century American home cooking reveals something that modern recipe culture tends to gloss over: grandmothers were not casual cooks. They were precise, economical, and deeply opinionated about technique. When culinary historian and author Ann Mendelson and others working in the field of American food archaeology analyze handwritten recipe cards from the 1950s and 1960s, a consistent set of practices emerges around deviled eggs specifically—practices that have since been quietly eroded by convenience culture.
The first revelation is almost shockingly simple: the eggs themselves were different. Home flocks, farm-stand purchases, and local dairy deliveries produced eggs with yolks of a deep, almost orange hue—the result of hens with access to varied, forage-rich diets. That yolk color isn't cosmetic. It corresponds to a higher fat content and a richer, more complex flavor. The pale, almost lemon-colored yolks typical of mass-produced supermarket eggs in recent decades taste, comparatively, like a watercolor version of the same painting.
In spring 2026, sourcing is easier than it has been in years. Farmers' markets across the country are seeing a renewed interest in heritage-breed hens and pasture-raised eggs. The difference in the deviled egg begins here, before you've cracked a single shell.
The hard-boil was never a hard boil
This is where most modern attempts go wrong first. The recipe card in your grandmother's tin box almost certainly did not say "boil for 12 minutes." The technique that produced a yolk with no gray ring, no sulfurous edge, and a texture smooth enough to pipe cleanly was a cold-start steam-finish method: eggs placed in cold water, brought to a full boil, then immediately removed from heat and covered for exactly 10 to 12 minutes before a transfer to an ice bath.
She may not have had the vocabulary for it, but she had the result. The gentle residual heat finishes the yolk without overcooking it. The ice bath stops the process completely and contracts the egg slightly inside the shell, making peeling cleaner. Modern instructions that say "boil for 10 minutes" skip the resting phase and produce that faint greenish ring that turns a yolk grainy and sharp-tasting.
The filling: fat, acid, and restraint
Helmann's or Best Foods mayonnaise launched nationally in the 1930s and became genuinely ubiquitous by the postwar era—and your grandmother likely used it without apology. But she used it in a ratio that modern recipes rarely respect. The historical standard, reconstructed from dozens of 1950s church cookbooks and Junior League collections, sits at roughly 1 tablespoon of mayonnaise per 2 yolks, not the equal-ratio creaminess that contemporary recipes favor. The yolk is the star; the mayo is the medium.
The acid component is where the most interesting divergence appears. Most modern deviled eggs use a splash of white vinegar or a squeeze of lemon. Mid-century versions overwhelmingly called for yellow mustard—not Dijon, not whole-grain, not stone-ground. French's yellow mustard, with its turmeric backbone and sharp, clean acidity, was the standard. It also explains the slightly deeper golden color of the filling in older photographs. Dijon is a legitimate substitute, but it produces a different flavor profile: more complex, less assertive, slightly more European. That's not the recipe being replicated here.
Salt was applied twice—once to the boiling water, once to the finished filling—and tasted carefully each time. White pepper, not black, kept the filling smooth and visually clean. Paprika was dusted on at the end, always, but it was smoked in Southern kitchens and sweet in Midwestern ones.
The grandmother's deviled eggs recipe
Ingredients
- 6 large pasture-raised eggs (the freshest available, but ideally 5–7 days old for easier peeling)
- 3 tablespoons full-fat mayonnaise (classic, not light, not avocado-oil variety)
- 1 teaspoon yellow mustard (French's or equivalent)
- 1 teaspoon apple cider vinegar
- ¼ teaspoon fine white pepper
- ½ teaspoon fine sea salt, plus more to taste
- Sweet or smoked paprika, for finishing
- Fresh chives or flat-leaf parsley, finely snipped, for garnish
Equipment
- Medium saucepan with lid
- Large bowl for ice bath
- Fine-mesh sieve or ricer (for the yolks)
- Fork or small whisk
- Piping bag or zip-lock bag with corner snipped
- Deviled egg tray or flat serving platter lined with lettuce
Preparation
1. Start with cold water, not boiling
Place the 6 eggs in a single layer in a medium saucepan. Cover with cold tap water by at least 1 inch. Set over high heat and bring to a full, rolling boil—the kind where large bubbles break the surface constantly. The moment you reach that point, remove the pan from heat entirely, cover it tightly with a lid, and set a timer for 11 minutes. Do not lift the lid. The trapped steam and residual heat finish the job without the agitation of continued boiling, which is what causes that gray-green ring around the yolk. While the eggs rest, prepare a large bowl of ice water—enough cold water and ice to fully submerge all six eggs.
2. Ice bath and peel
When the timer sounds, transfer the eggs immediately to the ice bath using a slotted spoon. Let them sit for a full 5 minutes—not three, not two. The cold contracts the egg inside the shell and creates a faint air gap that makes peeling dramatically cleaner. To peel, crack the egg gently on the counter, rolling it lightly under your palm to fracture the shell in multiple places, then peel under a thin stream of running cold water. The shell slips off in larger pieces. Pat each egg dry with a paper towel.
3. Halve and extract the yolks cleanly
Slice each egg in half lengthwise with one smooth, decisive cut using a thin sharp knife—not a sawing motion, which tears the whites. Pop the yolks out into a fine-mesh sieve set over a bowl. Press the yolks through the sieve with a spatula or the back of a spoon. This step, often skipped, is the single biggest textural difference between a grainy filling and a perfectly smooth one. It eliminates any lumps before you've added a single other ingredient. Arrange the empty whites cut-side up on a paper-towel-lined tray and refrigerate while you make the filling.
4. Build the filling in the correct order
To the sieved yolks, add the mayonnaise first and mix until fully incorporated before adding anything else. This prevents the acid from hitting the yolks directly, which can cause the proteins to tighten and the texture to turn slightly grainy. Add the yellow mustard and stir, then the apple cider vinegar. Add the white pepper and half the salt. Taste now—the filling should be rich, lightly sharp, with a clean eggy backbone. Adjust salt if needed. The consistency should be smooth enough to pipe easily but firm enough to hold a slight peak; if it's too thick, add ½ teaspoon of the ice bath water, not more mayonnaise.
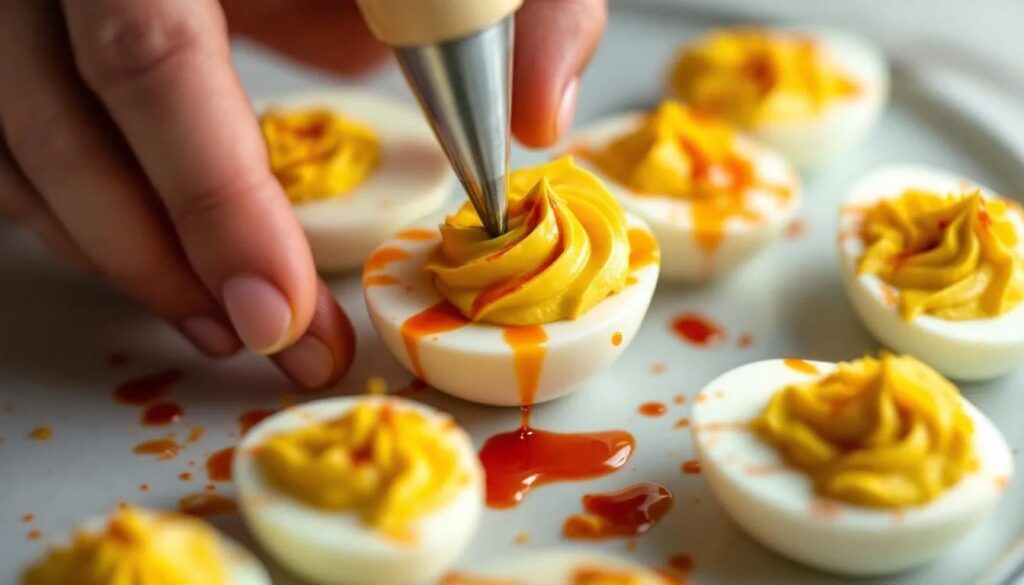
5. Fill, finish, and chill
Transfer the filling to a piping bag fitted with a star tip, or simply use a zip-lock bag with one corner snipped off. Pipe the filling into each white half in a clean, slightly elevated mound—overfill slightly, as the filling settles. Dust each egg with paprika through a fine-mesh tea strainer held about 8 inches above the tray; this gives an even, delicate coat rather than a heavy orange clump. Finish with a few snipped chives or a tiny parsley leaf. Cover loosely with plastic wrap and refrigerate for at least 30 minutes before serving. This resting time allows the filling to firm slightly and the flavors to merge.
The chef's note
The single step that most consistently transforms the result is the sieve. It takes 90 extra seconds and changes the texture of the filling completely. The other note worth keeping: cold eggs from the refrigerator, not room-temperature eggs, go into the cold water. The slow, even temperature rise from cold to boiling is part of what produces a centered, evenly cooked yolk. In spring, when new-season eggs are arriving at farmers' markets with their intensely colored yolks, the filling will look almost sunset-orange—deeper and more richly colored than anything store-bought can produce. Let it.
Pairing suggestions
Deviled eggs occupy that particular zone of American appetizer culture where the drink pairing matters more than people expect. The fat of the yolk filling and the mild acidity of the mustard and vinegar call for something with enough acidity to cut through without overwhelming the delicate egg flavor.
A crisp, unoaked Chardonnay from California or Burgundy works well—its clean fruit and restrained minerality don't compete with the filling. A dry Riesling from the Finger Lakes or Alsace, with its bright acidity and slight floral quality, is an equally strong match. For a non-alcoholic option, sparkling water with a squeeze of lemon and a few cucumber slices mirrors the same cutting acidity without adding sweetness.
The history behind the deviled egg
The deviled egg—a halved hard-boiled egg with a seasoned yolk filling piped back into the white—has roots considerably older than the church potluck circuit it became famous through. Recipes for stuffed eggs seasoned with vinegar, mustard, and spices appear in European cookbooks as far back as the 15th century, particularly in Spain and southern France. The term "deviled," meaning seasoned with mustard or other sharp, pungent condiments, appears in English culinary writing by the late 18th century, attached to everything from deviled bones to deviled kidneys.
The dish arrived in American domestic cooking through the 19th century and found its natural home in the postwar 1950s, when refrigeration made cold appetizers practical and the abundance of affordable eggs made them economical. The Junior League cookbook era—those spiral-bound community volumes that funded everything from hospital wings to historic preservation—canonized the deviled egg as standard American party food. Every family's version was slightly different: some added pickle relish, some used sweet onion, some finished with a sliver of green olive or a small shrimp. The version reconstructed here is the baseline, the platform from which every grandmother's variation launched.
Nutritional values (per serving of 2 halves, approximate values)
| Nutrient | Amount |
|---|---|
| Calories | ~110 kcal |
| Protein | ~6 g |
| Carbohydrates | ~1 g |
| of which sugars | ~0.5 g |
| Fat | ~9 g |
| Fiber | ~0 g |
Frequently asked questions
Can deviled eggs be made ahead of time?
Yes, and in fact they benefit from it. The filled eggs can be prepared up to 24 hours in advance and refrigerated on a covered tray. Store the filled eggs and any finishing garnish separately—add the paprika and fresh herbs only in the 15 minutes before serving, as the paprika absorbs moisture from the filling overnight and loses its color, and fresh herbs wilt. The whites can be filled up to 48 hours ahead if kept in an airtight container.
Why do my egg whites have a ragged edge when I cut them?
The most common cause is a slightly overcooked egg white, which becomes denser and tears more easily under the knife. The second cause is the cutting motion itself—use a single, confident downward slice with a thin, sharp blade rather than a sawing motion. Wipe the knife blade with a damp cloth between cuts for clean edges. Chilling the peeled eggs in the refrigerator for 15 minutes before slicing also firms the whites and produces a cleaner cut.
What substitutions work in the filling?
For the mayonnaise: full-fat Greek yogurt works in a 1:1 ratio and produces a slightly tangier, lighter filling—historically less accurate but genuinely good. For the mustard: Dijon is the most natural substitute and produces a more complex, slightly more pungent flavor. For the apple cider vinegar: white wine vinegar is nearly interchangeable; avoid balsamic, which discolors the filling. In spring, a tablespoon of finely minced fresh chive mixed into the filling itself (not just as garnish) adds a clean, green note that pairs naturally with the season.
Why are very fresh eggs harder to peel?
Fresh eggs have a lower pH in the white, which causes the white to bond more tightly to the inner membrane of the shell. As eggs age slightly—between 5 and 10 days old is ideal—carbon dioxide escapes through the shell and the pH rises, weakening that bond. This is why eggs purchased the day before from a farmers' market can be genuinely difficult to peel cleanly, while the same eggs a week later behave much better. If you only have very fresh eggs, adding a teaspoon of baking soda to the boiling water can help raise the pH artificially and ease peeling.
What's the best way to transport deviled eggs?
A dedicated deviled egg tray with individual indentations is the practical choice for transport, and they've returned to kitchen stores in force in recent years after decades as a thrift-store staple. In the absence of one, a sheet of parchment laid over ice in a shallow cooler works well—the cold keeps the filling firm and the parchment prevents the eggs from sliding. Avoid plastic wrap pressed directly onto the filling, which pulls at the piped surface and flattens the presentation.