
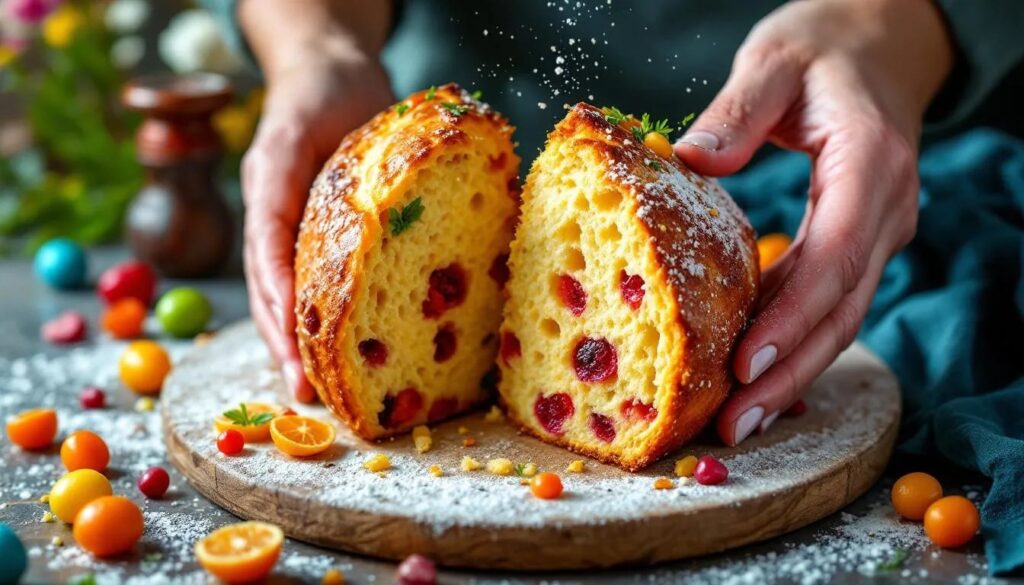
Spring feels different in Chicago's Polish neighborhoods. When you walk through Avondale or Jackowo in the days leading up to Easter, the bakery windows display braided loaves dusted in powdered sugar, adorned with colorful eggs nestled right into the dough. Before you even reach the door, you catch the scent of warm yeast and vanilla drifting onto the sidewalk. This is babka wielkanocna — Easter egg bread — and a few bakeries in Chicago's Polish community have been making it the same way for decades, using only six classic ingredients.
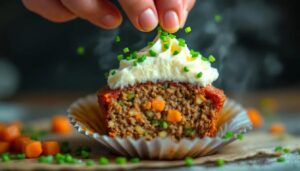
This bread’s appeal comes from the simplicity of its ingredients. It doesn’t rely on any bread improvers, enriched flour blends, or a mix of extracts. Instead, it uses just the essential ingredients, carefully handled with patience and intention. The braided shape holds raw eggs in their shells before baking. As the dough rises and browns in the oven, the eggs cook in place, turning the loaf into both bread and a beautiful centerpiece. This recipe replicates that bakery method for a home kitchen, staying true to the six-ingredient approach that makes it so special.
| Preparation | 30 min |
| Rest | 2 hr 30 min |
| Baking | 30 min |
| Servings | 1 loaf (8–10 slices) |
| Difficulty | Medium |
| Cost | $ |
| Season | Spring · Easter · Eggs · Butter |
Suitable for: Vegetarian
Ingredients
- 500 g all-purpose flour, plus more for dusting
- 7 g active dry yeast (one standard packet)
- 200 ml whole milk, warmed to ~110°F (43°C)
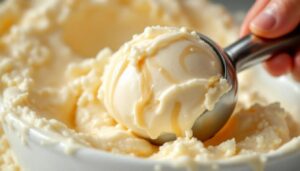
- 100 g unsalted butter, softened at room temperature
- 80 g granulated sugar
- 3 large eggs — 2 for the dough, 1 raw egg in its shell for the braid (dyed or natural)
Equipment
- Stand mixer with dough hook, or large mixing bowl
- Small bowl for proofing yeast
- Kitchen scale
- Bench scraper or sharp knife
- Baking sheet lined with parchment paper
- Kitchen thermometer
- Clean kitchen towel or plastic wrap
- Pastry brush
Preparation
1. Proof the yeast
Warm the milk to around 110°F (43°C) — it should feel just above body temperature on the inside of your wrist, not hot enough to sting. Pour it into a small bowl, stir in one teaspoon of the measured sugar, then sprinkle the yeast over the surface. Let it sit undisturbed for 8 to 10 minutes. You’re looking for a foam that actively rises and bubbles across the surface, an indication that the yeast is alive and ready. If nothing happens after 10 minutes, the milk may have been too hot or the yeast too old; start again with fresh yeast before proceeding. This single step determines the entire texture of the final loaf, so patience here is essential.
2. Build the enriched dough
In a large bowl or the bowl of a stand mixer, combine the remaining flour and sugar. Create a well in the center and add the two beaten eggs and the foamy yeast mixture. Mix on low speed with the dough hook — or use your hands — until the flour is fully incorporated and a shaggy mass forms. Increase to medium speed and begin adding the softened butter, one tablespoon at a time, waiting until each addition disappears into the dough before adding the next. This technique, known as enriching, prevents the gluten structure from being overwhelmed by fat all at once. The finished dough should feel soft, slightly tacky, and smooth, pulling cleanly from the sides of the bowl after about 8 minutes of kneading. It will not be stiff; an enriched dough is always more yielding than a lean bread dough.
3. First rise
Shape the dough into a round and place it in a lightly oiled bowl, turning it once to coat the surface. Cover with a clean towel or plastic wrap and let it rise in a warm, draft-free spot for 1 hour 30 minutes to 2 hours, until it has roughly doubled in volume. A cold kitchen will slow the rise. You can place the bowl inside an unheated oven with just the oven light on to create a gentle, consistent environment. Avoid checking it constantly; the dough rises at its own pace.
4. Divide and braid
Turn the risen dough onto a lightly floured surface and press it gently to release the gas. Divide it into three equal portions using a bench scraper. Weighing them on a scale ensures evenness, which is important for an even braid. Roll each portion into a rope about 18 inches (45 cm) long, keeping the thickness consistent from end to end. Pinch the three ropes together at the top and braid them loosely. If it’s too tight, the dough won’t have room to expand. When you reach the end, tuck both pinched ends neatly underneath the loaf. Carefully transfer it to the lined baking sheet.
5. Nest the egg and second rise
Gently press one raw egg, still in its shell, into the center of the braid. The dough will naturally hold it as it bakes, and the egg will cook through the residual heat inside the loaf. Cover the shaped loaf loosely and let it rise for a second rise of 30 to 45 minutes. The loaf should look visibly puffier and feel airy when you lightly press a fingertip against the side. Meanwhile, preheat the oven to 350°F (175°C).
6. Egg wash and bake
Beat the reserved egg white (or a small whole egg) with a splash of milk and gently brush it over the surface of the loaf, being careful not to deflate the dough with heavy-handed strokes. The egg wash gives the braid its characteristic deep amber gloss in the oven. Bake for 28 to 32 minutes, until the crust is a rich golden brown and the loaf sounds hollow when tapped on the bottom. An internal temperature of 190°F (88°C) confirms that it is fully baked through. Transfer to a wire rack and cool for at least 20 minutes before slicing, as cutting it too soon releases the steam that keeps the crumb tender.
My baker's tip
The Polish bakeries in Chicago dye their Easter eggs before nestling them into the bread, creating vibrant reds and blues that slightly bleed into the crust during baking, adding a halo of color around each egg. To replicate this at home, hard-boil the eggs first if you prefer a purely decorative result, or use a raw egg for the traditional version where the egg cooks directly in the loaf. Either way, lightly rub the shell with a neutral oil before pressing it in; it lifts out cleanly after baking without tearing the crumb. At this time of year, eggs with deep orange yolks from the farmers' market make a truly striking reveal at the table.
Drinks & Pairings
Easter egg bread exists at the sweet-savory intersection. It has enough richness from the butter and egg that it works both as a breakfast bread and alongside a cheese board. The pairing should complement it without overpowering its mild, pillowy crumb.
The traditional accompaniment is a cup of strong black tea, brewed Polish-style in a glass with a cube of sugar held between the teeth. For something more festive, a dry sparkling wine from Champagne or a Crémant d'Alsace cuts cleanly through the buttery richness without masking the subtle sweetness of the dough. A cold glass of whole milk is the most classic pairing of all, and is what you'll most likely find on the table in any Chicago Polish household on Easter morning.
The story behind the bread
Babka wielkanocna — which literally translates to "Easter grandmother's cake" — has been part of Polish Easter tradition for centuries. It marks the end of the Lenten fast and the richness on the holiday table. The egg nestled inside the braid represents new life, the return of spring, and the breaking of winter's cold. Polish immigrants brought the tradition to Chicago's North Side in the late 19th and early 20th centuries, and neighborhoods like Avondale maintained it through parish bakers, family recipes, and eventually dedicated Polish-owned bakeries that still operate today.
The six-ingredient formula isn’t a shortcut — it’s the original method. Pre-war Polish baking relied on what was available and affordable: flour, milk, butter, eggs, sugar, and yeast. The skill was in the handling, the timing of the rises, and the tension of the braid. Contemporary versions sometimes include vanilla, lemon zest, or a powdered sugar glaze, and all of those variations are great. However, the stripped-down loaf from a Chicago neighborhood bakery, made the same way every March for generations, demonstrates what good technique can achieve without assistance.
Nutrition facts (per slice, approximate values)
| Nutrient | Amount |
|---|---|
| Calories | ~210 kcal |
| Protein | ~6 g |
| Carbohydrates | ~30 g |
| of which sugars | ~7 g |
| Fat | ~8 g |
| Fiber | ~1 g |
Frequently asked questions
Can the dough be made the night before?
Yes, after the first rise, punch the dough down, cover the bowl tightly with plastic wrap, and refrigerate overnight. The cold slows the yeast without stopping it entirely, and a slow overnight fermentation actually deepens the flavor of the crumb. The next morning, remove the dough from the refrigerator, let it return to room temperature for about 30 minutes, then shape and proceed with the second rise and baking as usual.
How should the bread be stored?
Wrap the cooled loaf tightly in plastic wrap or store it in an airtight bag at room temperature for up to 2 days. The butter content prevents the crumb from drying out quickly, but enriched breads do stale faster than lean ones. For longer storage, slice and freeze. Individual slices thaw at room temperature in about 20 minutes, or can be warmed briefly in a toaster oven directly from frozen.
What substitutions work in a six-ingredient recipe?
With only six ingredients, each one is crucial. That said, plant-based milk (oat or soy work better than almond for structure) can replace whole milk with minimal impact on the final texture. Vegan butter substitutes will slightly alter the crumb—expect it to be a little less tender. The eggs are harder to replace in an enriched dough; flax eggs will bind but won't contribute the same lift or color. If you want to enhance the flavor without adding an ingredient, a pinch of fine sea salt added with the flour makes a noticeable difference to the bread's taste.
Does the egg baked into the bread stay safe to eat?
A raw egg in its shell placed into the braid before the second rise will reach a safe internal temperature during baking at 350°F. The shell conducts enough heat to fully cook the egg as the loaf bakes for 30 minutes. The egg cooked this way has a texture similar to a hard-boiled egg with a slightly firm yolk. If you prefer a purely decorative result, or if you are serving anyone immunocompromised, use a hard-boiled egg from the start; it will hold its shape equally well and lift out cleanly after slicing.
How do Polish bakeries in Chicago get the braid so tight and even?
Professional bakers work with dough that has been portioned on a scale to the gram, and they roll each rope on a cool, barely floured surface. Too much flour prevents the dough from gripping itself and produces a looser, sloppier braid. The ropes are rolled from the center outward with the palms rather than the fingertips, which keeps the thickness uniform. Braiding loosely, with some slack between the strands, also gives the loaf room to expand in the oven without splitting at the seams. A tight, compressed braid will burst open during baking as the yeast rises.