


As the days stretch longer and the first warmth of spring settles over the Northern Hemisphere, the craving for something cold and creamy starts to surface — sometimes weeks before summer even arrives. No-churn ice cream answers that craving without demanding a single piece of specialist equipment. Two ingredients, a bowl, a whisk, and a freezer: that's all it takes to produce a scoop that rivals anything sold by the pint at a premium price. The simplicity is not a compromise — it's the point.
This method has been quietly circulating in home kitchens for years, championed by cooks who understood that the science behind commercial ice cream — the churning, the custard base, the stabilizers — can be replicated through a different but equally elegant mechanism: air whipped into heavy cream, held in place by the dense, sugary embrace of sweetened condensed milk. What follows is a complete guide to making this two-ingredient base from scratch, understanding why it works, and building it into something worth returning to every time the temperature climbs.
| Preparation | 15 min |
| Rest (freezing) | 6 hours minimum (overnight ideal) |
| Portions | 8 servings |
| Difficulty | Easy |
| Cost | $ |
| Season | Spring into summer — pairs well with first strawberries, mango, citrus zest |
Suitable for: Vegetarian · Gluten-free
Ingredients
- 2 cups (480 ml) heavy whipping cream, very cold
- 1 can (14 oz / 397 g) sweetened condensed milk, at room temperature
Optional flavorings to stir into the condensed milk before folding:
- 1 tsp pure vanilla extract
- 2 tbsp cocoa powder (unsweetened), sifted
- ½ cup (120 g) strawberry jam or fresh berry purée, lightly reduced
- Zest of 2 lemons or 1 lime
- 3 tbsp instant espresso powder dissolved in 1 tbsp hot water, cooled
Equipment
- Large mixing bowl (chilled in the freezer for 10 minutes beforehand)
- Hand mixer or stand mixer fitted with the whisk attachment
- Rubber spatula
- 9×5 inch (23×13 cm) loaf pan or any shallow freezer-safe container
- Plastic wrap or an airtight lid
Preparation
1. Chill Everything that Touches the Cream
Place your mixing bowl and the whisk attachment in the freezer for at least 10 minutes before you begin. Heavy cream whips faster and holds its structure longer when every surface it contacts is cold. This is not a fussy precaution — it genuinely changes the result. If your kitchen is warm, keep the carton of cream refrigerated until the very last second. The goal is to introduce as much air as possible into the cream before any warmth has the chance to deflate it.
2. Whip the Heavy Cream to Stiff Peaks
Pour the cold heavy cream into the chilled bowl and begin whisking on medium speed, then increase to high once the cream starts to thicken and turn opaque. You are looking for stiff peaks — the stage at which the cream holds a firm, upright tip when the whisk is lifted, without slumping or drooping. This typically takes 3 to 5 minutes with a hand mixer. Do not walk away: over-whipped cream turns grainy and begins to separate into butter, which cannot be undone. Stop the moment the peaks stand firm and glossy.
3. Prepare the Condensed Milk Base
In a separate bowl, open the can of sweetened condensed milk and pour it in. At room temperature, it flows easily and blends without resistance. Now is the time to add any flavoring you want to use: vanilla extract, espresso, citrus zest, or sifted cocoa powder can all be stirred directly into the condensed milk before it meets the cream. Mix thoroughly so the flavor is evenly distributed throughout the base — you won't get another opportunity once the cream is folded in.
4. Fold the Two Components Together
Add roughly one third of the whipped cream to the condensed milk and use a rubber spatula to stir it in with confidence — this first addition loosens the condensed milk and makes the subsequent folding easier without deflating the whole batch. Add the remaining whipped cream in two additions, using a wide, gentle folding motion: draw the spatula down through the center, across the bottom of the bowl, and up and over the top, rotating the bowl slightly with each stroke. The aim is to combine the two without pressing out the air you worked to incorporate. Stop when the mixture is uniform in color and no streaks of cream remain visible.
5. Transfer to the Pan and Freeze
Pour the mixture into a loaf pan or container, spreading it to an even layer with the spatula. If you want a ripple effect — swirls of jam, caramel, or fruit curd — drop spoonfuls across the surface and drag a skewer or knife through in slow, deliberate strokes. Press a sheet of plastic wrap directly onto the surface of the ice cream to prevent ice crystals from forming on top, then seal the container. Freeze for a minimum of 6 hours, though overnight gives a firmer, more cohesive scoop. Remove from the freezer 3 to 5 minutes before serving to allow the ice cream to soften slightly at the edges.
My chef's tip
The ratio of heavy cream to condensed milk is the structural core of this recipe — respect it. If you reduce the condensed milk to cut sweetness, the ice cream will freeze too hard and lose its scoopable texture; if you add too much, it becomes dense and fudge-like rather than airy. Instead, control sweetness by choosing an unsweetened flavoring — a good dark cocoa, cold brew concentrate, or the natural tartness of fresh citrus zest. Right now, in late March, the first blood oranges are still available and their juice reduced down to a syrup makes an extraordinary fold-in, bringing both color and a bittersweet edge that balances the richness of the condensed milk perfectly.
Flavor pairings and serving suggestions
No-churn ice cream carries flavor cleanly, which makes it an ideal companion to textures it cannot provide on its own. Consider contrast: a scoop alongside a warm, just-baked crisp, sandwiched between two thin almond cookies, or served in a cold bowl with a drizzle of good extra-virgin olive oil and a pinch of flaky salt if you've made it plain vanilla.
For beverages, a strong affogato works brilliantly — pull a double espresso directly over a scoop and serve immediately. If you're entertaining and want something more considered, a late-harvest Riesling with pronounced stone-fruit notes works with vanilla or peach variations, while a chilled Pedro Ximénez sherry — poured over chocolate no-churn — turns dessert into something considerably more deliberate. For a non-alcoholic option, sparkling water with a squeeze of lime cuts through the richness and resets the palate between bites.
The story behind the method
Sweetened condensed milk has been a pantry staple in North America and across Southeast Asia, Latin America, and the Middle East for well over a century, originally developed as a preservation technology before refrigeration became widespread. Its role in no-churn ice cream is relatively recent in the timeline of published recipes, gaining significant traction through food media in the early 2010s as home cooks began questioning whether ice cream machines were truly necessary. The answer, it turned out, was no — provided you understood what a machine actually does.
A traditional ice cream machine churns the mixture continuously as it freezes, breaking up ice crystals as they form and incorporating air, which produces the smooth, scoopable texture we associate with the finished product. No-churn ice cream achieves both goals through different means: the whipped cream pre-loads the mixture with air before freezing begins, while the high sugar content of the condensed milk lowers the freezing point of the mixture and disrupts crystal formation — the same principle behind the smoothness of a well-made sorbet. The result is structurally different from churned ice cream but not inferior to it. It is denser, richer, and arguably better suited to bold mix-ins and intense flavorings precisely because its texture holds rather than scatters them.
Nutritional information (per serving, approximate values)
| Nutrient | Amount |
|---|---|
| Calories | ~310 kcal |
| Protein | ~5 g |
| Carbohydrates | ~30 g |
| of which sugars | ~29 g |
| Fat | ~20 g |
| of which saturated fat | ~13 g |
| Fiber | ~0 g |
Frequently asked questions
Can this ice cream be made ahead of time?
Yes — and it actually benefits from it. Prepared the night before, the ice cream has time to freeze fully and develop a firmer, more cohesive texture than a batch pulled after only a few hours. It keeps well in the freezer for up to two weeks without significant quality loss, provided the surface is covered with plastic wrap pressed directly against the ice cream to block contact with air.
Why is my no-churn ice cream icy rather than creamy?
The most common cause is insufficient air in the whipped cream. If the cream was only whipped to soft peaks rather than stiff peaks, the mixture freezes denser and forms larger ice crystals. A second possibility is a storage container that wasn't airtight, allowing freezer moisture to infiltrate the surface. Always press plastic wrap directly onto the ice cream — not just over the top of the container — before sealing.
What substitutions are possible?
The heavy cream can be swapped for full-fat coconut cream (chilled overnight so the solids separate from the liquid — use only the thick solids) to produce a dairy-free version with a gentle coconut note that pairs particularly well with mango or lime. Sweetened condensed coconut milk is also commercially available and works in exactly the same ratio. Do not attempt to substitute low-fat cream or half-and-half — neither contains enough fat to whip to stiff peaks, and the structure of the finished ice cream depends entirely on that whipped fat network holding air throughout the freeze.
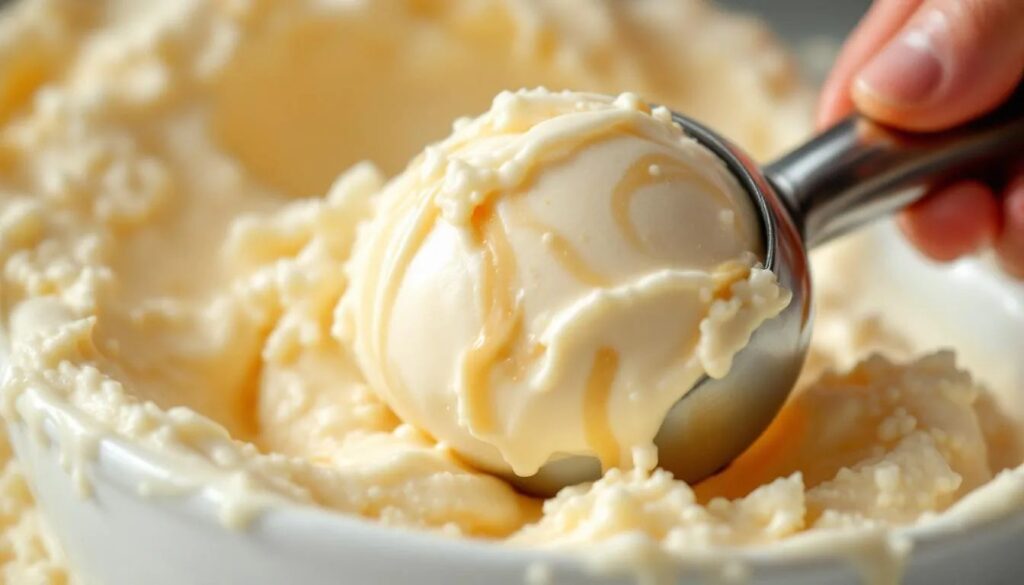
How do I get clean scoops?
Remove the container from the freezer 3 to 5 minutes before serving. Run your ice cream scoop under hot water, shake off the excess, and press firmly into the surface using a rocking motion rather than a straight dig. The brief temper at room temperature softens the outer layer just enough to allow the scoop to move through without cracking the ice cream. Repeat the hot-water dip between scoops for consistently round, smooth portions.
Can I add mix-ins like chocolate chips or nuts?
Fold mix-ins into the finished base just before transferring it to the pan — not before, as heavier additions like chocolate chips or crushed cookies will sink during the folding process if added too early. Toasted nuts, rippled jams, swirls of peanut butter, crushed shortbread, or caramel sauce all integrate well. Avoid very watery additions like fresh whole berries, which release moisture during freezing and create icy pockets; instead, reduce berry purées briefly on the stove and cool completely before using.