Late March in England has always carried a particular kind of anticipation. The days are lengthening, the first daffodils push through cold soil, and somewhere in the back of every baker's mind, hot cross buns begin to take shape. These spiced, yeasted rolls — marked with a white cross, glazed until they catch the light — are one of the most quietly compelling things British baking has ever produced. When a friend passed along a handwritten copy of a recipe traced back to the early 1800s, the kind transcribed from a household ledger with ink that had long since faded to rust, there was no question of what to do with it.
What followed was three days of testing, two near-disasters, and one genuinely revelatory batch of buns that bore almost no resemblance to anything sold in a supermarket. The dough was wetter than expected, the spice blend stranger, and the cross — made not from a flour paste but from a strip of short pastry — far more theatrical. This is a record of that process: what the old recipe demanded, where it differed from modern versions, and exactly how to reproduce it at home in time for Easter.
| Preparation | 45 min |
| Resting | 2 hrs 30 min |
| Baking | 20 min |
| Yield | 12 buns |
| Difficulty | Intermediate |
| Cost | ££ |
| Season | Spring · Easter · dried currants, candied peel, warming spices |
Ingredients
For the dough
- 500 g strong white bread flour, plus extra for dusting
- 7 g fast-action dried yeast (1 sachet)
- 75 g caster sugar
- 1 tsp fine sea salt
- 1½ tsp ground mixed spice
- ½ tsp ground cinnamon
- ¼ tsp ground mace — the original recipe specified this alongside cinnamon, giving a warmer, more floral heat than cinnamon alone
- ¼ tsp ground cloves
- Zest of 1 large unwaxed lemon
- Zest of 1 small orange
- 75 g unsalted butter, at room temperature, cubed
- 2 medium eggs, beaten
- 200 ml whole milk, warmed to approximately 38°C
- 50 ml warm water
- 150 g dried currants
- 50 g candied mixed peel, finely chopped
For the pastry cross
- 75 g plain flour
- 40 g cold unsalted butter, cubed
- 2–3 tbsp cold water
For the glaze
- 3 tbsp apricot jam
- 1 tbsp water
Equipment
- Stand mixer fitted with a dough hook (or large mixing bowl and strong arms)
- Large baking tray, approximately 30 × 40 cm
- Digital kitchen scales
- Digital thermometer
- Rolling pin
- Sharp knife or pastry wheel
- Pastry brush
- Cling film or damp tea towel
- Wire cooling rack
Method
1. Activating the yeast and building the dough
Combine the warm milk and warm water in a small jug — the temperature matters here. Too cold and the yeast remains sluggish; too hot, above 45°C, and you risk killing it entirely. A digital thermometer is the most reliable way to check. Stir in a pinch of the measured sugar and the dried yeast, then set the jug aside for 8 to 10 minutes. The surface should become visibly frothy, almost pillowy, before you proceed. This is called proofing the yeast — confirming it is active and ready to leaven the dough. Meanwhile, place the flour, remaining sugar, salt, mixed spice, cinnamon, mace, cloves, and both citrus zests into the bowl of your stand mixer. Whisk briefly with a fork to distribute the spices evenly throughout the flour — this small step prevents pockets of concentrated flavor in the finished bun.
2. Incorporating butter, eggs, and liquid
Add the cubed room-temperature butter to the flour mixture. With the dough hook attached, run the machine on a low speed for about 2 minutes, until the butter breaks down and the mixture resembles coarse breadcrumbs — the technique is essentially the same as rubbing in, carried out mechanically. Pour in the beaten eggs, then the frothy yeast liquid, in a slow, steady stream with the machine still running. Increase to a medium speed and knead for 8 full minutes. The dough will seem alarmingly wet at first, almost batter-like, and the instinct will be to add more flour. Resist this. The old recipe produced a slack, enriched dough, and this is what gives the finished bun its soft, slightly chewy crumb. By minute six, the dough should be pulling cleanly away from the sides of the bowl, elastic and just slightly tacky to the touch.
3. Adding currants and candied peel
Tip in the dried currants and finely chopped candied peel. The original recipe called for "a good handful of currants and such peel as one may find" — generous but imprecise by modern standards. Run the mixer on a low speed for a further 2 minutes, just long enough for the fruit to be evenly distributed without it being crushed or broken down into the dough. If working by hand, scatter the fruit over the dough on a lightly floured surface and fold it in gradually, using a series of stretches and folds rather than vigorous kneading, which would break the currants and stain the dough purple.
4. First rise — bulk fermentation
Shape the dough into a rough ball and transfer it to a lightly oiled large bowl. Cover tightly with cling film or a damp tea towel and leave at room temperature — ideally somewhere consistently warm, around 24–26°C — for 1 hour 30 minutes, or until the dough has roughly doubled in size. Bulk fermentation is the first rise, during which the yeast consumes sugars in the dough and produces carbon dioxide, creating the structure that will later hold the bun's shape in the oven. A colder kitchen will simply mean a longer wait; do not rush this stage by applying direct heat, which develops yeast activity unevenly.
5. Shaping the buns
Turn the risen dough out onto a lightly floured surface and divide it into 12 equal pieces — a scale makes this straightforward, each piece weighing approximately 95–100 g. To shape each bun, cup one piece beneath the palm of your hand, fingers curled loosely, and roll it in tight circles against the work surface. The friction between dough and surface draws the outside of the dough around itself, creating surface tension and a smooth, taut skin. This is called rounding, and it is what produces an evenly domed bun rather than a flat, spreading one. Place the shaped buns on a lined baking tray, spacing them roughly 2 cm apart — close enough that they will just touch as they prove, encouraging them to rise upward rather than outward.
6. Second rise — proving
Cover the tray loosely with lightly oiled cling film and leave the buns to prove at room temperature for a further 45 to 60 minutes. They should look noticeably puffed, soft, and just beginning to nudge their neighbors. Preheat the oven to 200°C / 180°C fan / Gas 6 during the final 15 minutes of this second rise.
7. Making the pastry cross
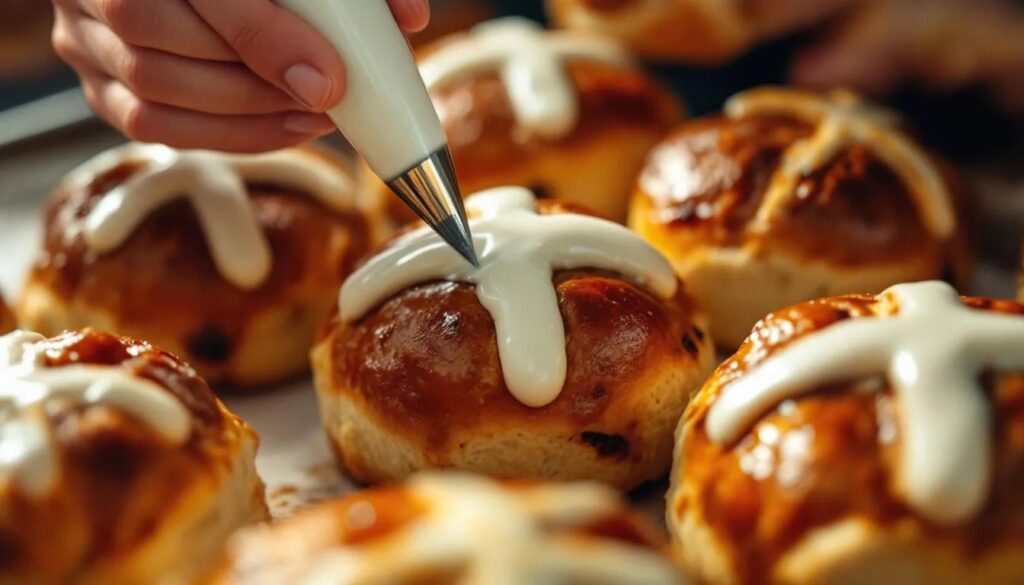
This is where the 200-year-old recipe diverges most sharply from any modern version. Rather than a paste of flour and water piped on in a thin line, the cross is cut from a short pastry rolled to about 2–3 mm thickness and pressed gently onto each proved bun. Rub the cold butter into the plain flour until the mixture resembles fine sand, then add cold water a tablespoon at a time until the dough just comes together — exactly as you would make shortcrust pastry. Roll it out on a lightly floured surface and cut it into thin strips, approximately 8 mm wide. Lay two strips over each bun in a cross pattern, pressing the ends lightly into the sides of the dough. In the oven, this pastry sets to a pale, crumbly cross with a distinctly different texture from the bun itself — the contrast is striking and, it must be said, rather beautiful.
8. Baking
Slide the tray into the preheated oven and bake for 18 to 22 minutes, until the buns are a rich, deep golden brown — not pale gold, not dark amber, but the warm color of fresh caramel. The pastry cross will be set and just beginning to color at its edges. The base of the buns, when one is lifted with a palette knife, should sound hollow when tapped — a reliable sign that the bread is baked through. Remove from the oven and leave on the tray for 3 minutes.
9. Glazing
Warm the apricot jam and water together in a small saucepan over a low heat, stirring until the jam melts and loosens to a brushable consistency. Strain out any large pieces of fruit. Brush this glaze generously over the hot buns, working quickly and letting it pool slightly in the crevices around the cross. The heat of the buns will set the glaze almost immediately to a glossy, lightly sticky finish. Transfer to a wire rack.
A note from the original recipe
The 1820s household ledger from which this recipe was transcribed noted that the buns should be eaten "warm, with butter, on Good Friday morning" — a tradition rooted in the belief that bread baked on that day would not go mouldy and could be kept as a charm against illness. The pastry cross, rather than the now-standard flour paste, appears in several English baking records from this period, suggesting it was once the more common technique before the convenience of a piped paste took over. There is nothing in the original recipe about icing. There never was.
Pairing suggestions
Hot cross buns occupy a curious space — enriched but not cloying, spiced but not aggressive — that calls for drinks with some body and character rather than anything sharp or tannic.
A pot of strong Assam tea, brewed for four minutes and taken with a splash of cold whole milk, is the historically accurate choice and, frankly, the right one. The malty, slightly astringent quality of Assam cuts through the richness of the butter while complementing the dried fruit. For something different, a lightly spiced chai with warm milk echoes the cinnamon and clove in the bun without overwhelming it. For those preferring something cold, a glass of cloudy apple juice — from freshly pressed early English varieties if you can find them at this time of year — works remarkably well.
History and context
Hot cross buns have been eaten in England around Easter for several centuries, though their precise origins remain debated. Some food historians trace the marked bun back to pre-Christian traditions involving bread offered at spring festivals; others point to an Anglican monk at St Albans in the 14th century as the first recorded producer. By the 18th century, London street sellers were hawking them from baskets on Good Friday mornings, their cries — "Hot cross buns! Hot cross buns! One a penny, two a penny, hot cross buns!" — familiar enough to become a nursery rhyme.
What changed significantly over the 19th and 20th centuries was the spice profile, the fruit quantity, and the cross itself. Earlier recipes frequently included mace and cloves alongside the now-standard cinnamon; the cross migrated from short pastry to flour paste to, in many commercial versions, a white icing applied after baking — a development that would have puzzled any Georgian baker. The 200-year-old recipe used here sits at a point in history where the bun was still clearly a serious piece of bread baking, made with intention and eaten as part of a specific day's ritual rather than as a year-round supermarket commodity.
Nutritional values (per bun, approximate figures)
| Nutrient | Amount |
|---|---|
| Calories | ~310 kcal |
| Protein | ~7 g |
| Carbohydrates | ~50 g |
| of which sugars | ~18 g |
| Fat | ~10 g |
| Fiber | ~2 g |
Frequently asked questions
Can the dough be prepared the night before?
Yes, and with excellent results. After the first rise, shape the buns, place them on the lined tray, cover tightly with oiled cling film, and refrigerate overnight. The cold slows — but does not stop — the yeast activity, and a slow, cold prove develops noticeably more complex flavor. Remove the tray from the fridge an hour before baking and allow the buns to come back to room temperature and finish proving before applying the pastry cross and baking as directed.
How should leftover buns be stored?
Store in an airtight container at room temperature for up to 2 days. Like all enriched breads, hot cross buns stale relatively quickly, but they revive well when split and toasted under a medium grill for 2 to 3 minutes per side — this brings back much of the original texture and intensifies the spiced aroma. They also freeze exceptionally well: wrap individually in cling film and freeze for up to 3 months. Defrost at room temperature for 2 hours, then warm in a 160°C oven for 8 minutes.
What substitutions work in this recipe?
Dried currants can be replaced by raisins, sultanas, or a mixture of both, though currants give a sharper, more concentrated fruit flavor that suits the spice blend particularly well. For a different take at this time of year, finely chopped dried apricots mixed with a few dried cranberries work surprisingly well. The mace, which can be difficult to find, can be replaced with an equal quantity of ground nutmeg — the flavor is related, slightly softer, and more familiar. Dairy-free butter and oat milk can be substituted in equal quantities for a lactose-free version, though the crumb will be marginally less tender.
Why use pastry for the cross rather than a flour-and-water paste?
The flour-and-water paste cross, familiar from most contemporary recipes, sets hard during baking and can become almost tasteless — it is structural more than anything else. The short pastry cross from this older recipe behaves differently: it sets to a crumbly, buttery layer that contrasts with the soft bun beneath it, and it carries a faint richness that integrates with the glazed surface. It is also more forgiving if the buns spread slightly during proving, since the pastry strips can be pressed down to follow the shape. The trade-off is a slightly more involved preparation, but the result is worth the extra step.
Is this recipe appropriate for Good Friday specifically, or can it be made throughout Easter week?
Historically, Good Friday was the only day on which hot cross buns were baked and sold in England — baking them on any other day was once considered unlucky, or at minimum, unusual. That superstition has not survived the supermarket era intact. In practice, the buns are well-suited to the whole of Holy Week, and making them on the Thursday before Good Friday means they are at their best — still fresh, fully spiced — when they are traditionally eaten the following morning. By Easter Sunday they are, ideally, finished.