

March is the season when pastry cravings hit differently. The days are stretching a little longer, the air carries that first hint of warmth, and there's a particular desire for something silky, buttery, and quietly impressive — the kind of thing you'd find behind a glass case at a serious bakery, priced at a level that makes you pause. A custard tart, at its best, is one of the most technically rewarding things a home baker can produce: a crisp, golden shell filled with a cream that trembles at the touch, fragrant with vanilla, just barely set. The gap between a mediocre custard tart and a great one comes down to a handful of decisions made at the right moment.
This recipe walks through every one of those decisions — the resting of the dough, the tempering of the eggs, the exact texture you're aiming for when the tart comes out of the oven. It draws on the tradition of the classic European crème pâtissière tart while adapting techniques for a home kitchen without professional equipment. The result is a tart with a shell that shatters cleanly and a custard that holds a thin, barely bronzed skin on top — the hallmark of a well-executed bake. Preheat the oven, chill your butter, and let's build something worth the effort.
| Preparation | 40 min |
| Chilling | 1 hr 30 min |
| Baking | 45 min |
| Servings | 8 slices |
| Difficulty | Intermediate |
| Cost | $$ |
| Season | Year-round · Spring vanilla and citrus zest variations |
Suitable for: Vegetarian
Ingredients
For the shortcrust pastry (pâte sablée)
- 1 ¼ cups (160 g) all-purpose flour, plus more for dusting
- ¼ cup (30 g) powdered sugar
- ¼ tsp fine sea salt
- ½ cup (113 g) unsalted butter, very cold, cut into ½-inch cubes
- 1 large egg yolk
- 2–3 tbsp ice water
For the vanilla custard filling
- 2 cups (480 ml) whole milk
- ½ cup (120 ml) heavy cream
- 1 vanilla bean, split and scraped (or 2 tsp pure vanilla extract)
- 4 large egg yolks
- 1 large whole egg
- ½ cup (100 g) granulated sugar
- 3 tbsp (25 g) cornstarch
- 1 tbsp (14 g) unsalted butter, softened
- Freshly grated nutmeg, for finishing
Equipment
- 9-inch (23 cm) fluted tart pan with removable base
- Mixing bowls (large and medium)
- Rolling pin
- Pastry weights or dried beans
- Parchment paper
- Medium saucepan
- Whisk
- Fine-mesh strainer
- Instant-read thermometer (strongly recommended)
- Plastic wrap
Preparation
1. Make the pâte sablée
Combine the flour, powdered sugar, and sea salt in a large bowl. Add the cold butter cubes and work them into the dry ingredients using your fingertips, pressing each piece flat before breaking it into smaller fragments. You are aiming for a texture that resembles coarse breadcrumbs with some pea-sized chunks of butter still visible — this unevenness is what creates the characteristic short, crumbly texture of a pâte sablée, as opposed to a smooth, uniform paste. Speed matters here: the warmth of your hands is the enemy of good shortcrust. Work quickly, and if the butter starts to soften, put the bowl in the freezer for five minutes before continuing. Once the mixture looks right, make a well in the center, add the egg yolk, and drizzle in two tablespoons of ice water. Use a fork to bring the dough together, adding the third tablespoon of water only if the dough refuses to hold when you press a pinch between your fingers. Turn the dough out onto a lightly floured surface, bring it together with just two or three firm presses of your palm — do not knead — and flatten it into a disk about an inch thick. Wrap tightly in plastic and refrigerate for at least one hour.
2. Roll and line the tart pan
Once rested, remove the dough from the refrigerator and let it sit at room temperature for five minutes — it should be pliable but still cold enough that it doesn't stick to the surface. Flour your work surface and rolling pin lightly. Roll the dough out from the center outward, rotating it a quarter turn every few passes, until you have a circle roughly 12 inches (30 cm) in diameter and about ⅛ inch thick. The goal is even thickness throughout; any thin patches will crack during blind baking. Carefully drape the dough over your rolling pin and transfer it to the tart pan, easing it into the fluted edges without stretching. Stretching is the primary cause of shrinkage — lift rather than pull. Trim the excess with a clean pass of the rolling pin over the rim, then use your thumb to press the dough slightly above the rim to compensate for any shrinkage during baking. Prick the base all over with a fork — this docking prevents large air pockets from forming — and refrigerate the lined shell for 30 minutes.
3. Blind bake the shell
Preheat the oven to 375°F (190°C), with a rack positioned in the lower third. Press a sheet of parchment paper into the chilled tart shell, covering the base and sides, then fill it with pie weights or dried beans, making sure they press against the sides all the way to the top. Bake for 20 minutes, until the edges are set and beginning to color very lightly at the rim. Remove the parchment and weights carefully — they hold heat — and return the shell to the oven for a further 10 to 12 minutes, until the base is dry to the touch and a pale, uniform gold across the entire surface. Look for an even biscuit-colored base with no grey or wet patches; any underbaked section will go soggy once filled. Remove from the oven and allow to cool slightly. Reduce the oven temperature to 325°F (165°C) at this point.
4. Build the custard base
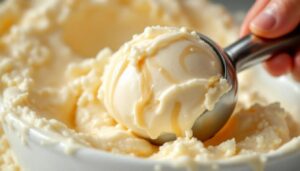
Combine the whole milk, heavy cream, and vanilla bean pod and seeds in a medium saucepan. Place over medium heat and bring slowly to just below a simmer — the surface should quiver and send up wisps of steam, but the liquid must not boil. While the dairy warms, whisk together the egg yolks, whole egg, and granulated sugar in a large bowl until the mixture turns slightly pale and the sugar has begun to dissolve, about two minutes. Add the cornstarch and whisk thoroughly until no dry lumps remain. Cornstarch here acts as a stabilizer, giving the custard enough body to slice cleanly while remaining softer and more trembling than a firm pastry cream. Once the milk mixture is steaming, begin tempering: pour roughly one-third of the hot liquid into the egg mixture in a slow, steady stream while whisking constantly. This gradually raises the temperature of the eggs, preventing them from scrambling when they meet the full heat of the pan. Pour the tempered egg mixture back into the saucepan with the remaining hot dairy.
5. Cook and finish the custard
Return the saucepan to medium heat and cook, whisking continuously, scraping the bottom and corners of the pan with every pass. Within three to four minutes the custard will begin to thicken noticeably, then suddenly it will catch and tighten all at once — keep whisking through this moment without pausing. Once the mixture reaches 185°F (85°C) on an instant-read thermometer and has the consistency of a thick, pourable pudding that coats the back of a spoon heavily, remove from the heat. Remove and discard the vanilla pod. Add the softened butter and whisk until it is fully incorporated and the custard is smooth and glossy. Pass the custard through a fine-mesh strainer into a clean bowl or pitcher to remove any cooked egg strands and ensure a perfectly silky texture.
6. Fill and bake the tart
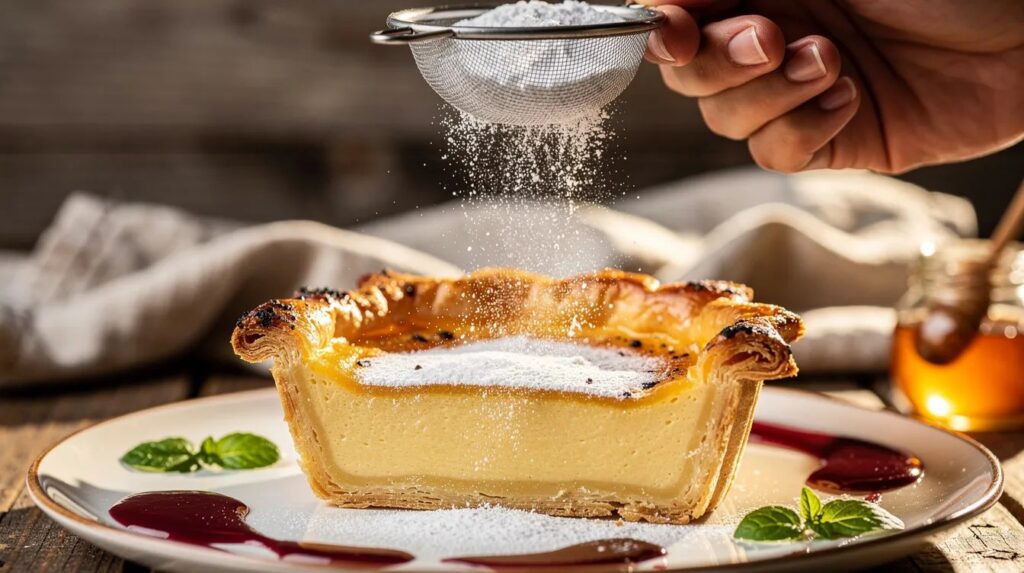
Pour the warm custard into the blind-baked shell, filling it to just below the rim. The custard will still be pourable and fluid at this stage — that is correct. Grate a fine dusting of fresh nutmeg over the surface; this is both traditional and functional, its warmth cutting through the richness of the cream. Slide the tart carefully into the oven at 325°F (165°C) and bake for 25 to 30 minutes. The tart is ready when the edges are fully set but the center retains a pronounced wobble when you gently nudge the pan — not a liquid slosh, but a slow, unified quiver, like set gelatin. The surface should show a thin skin, lightly freckled with amber. It will continue to set as it cools. Allow the tart to cool at room temperature for at least one hour before refrigerating for a minimum of two hours.
A Chef's Note
The single most common mistake with custard tarts is pulling them from the oven when they look fully set — by that point, they're already overbaked, and the texture will be chalky rather than silky. Trust the wobble test over visual cues. If you're baking in early spring and want to lean into the season, infuse the dairy with two strips of Meyer lemon zest alongside the vanilla — steep for 10 minutes off the heat before straining — for a brightness that lifts the whole tart. A light dusting of powdered sugar before serving, passed briefly under the broiler for 60 seconds, creates a thin caramelized crust in the style of a Portuguese pastel de nata.
Pairing Suggestions
A well-made custard tart carries rich dairy fat, egg yolk depth, and a clean vanilla finish. A beverage pairing should mirror or gently contrast those qualities without overwhelming the delicacy of the custard.
A late-harvest Riesling from Alsace or the Mosel Valley — with its characteristic notes of stone fruit, honey, and bright acidity — cuts through the cream and underlines the vanilla in a particularly elegant way. For something more locally approachable, a Californian late-harvest Viognier or a Sauternes-style dessert wine from Washington State offers similar balance. For a non-alcoholic option, a well-brewed Earl Grey tea, slightly cooled and served without milk, pairs beautifully: the bergamot echoes the vanilla while the tannins provide contrast to the fat of the custard.
The History Behind the Custard Tart
Custard tarts appear across culinary traditions in a way that few other pastries do, each culture arriving at a similar concept through its own logic. The English custard tart — a staple of bakeries and market stalls since at least the medieval period — was traditionally made with spiced cream and eggs set in a pastry coffin. In Portugal, the pastel de nata developed in Lisbon's Belém district in the early 19th century, when monks at the Jerónimos Monastery began selling small cream-filled pastries to supplement their income. Hong Kong's egg tart, a direct descendant of British influence during the colonial period, adapted the concept into a shallower, flakier format with a lighter custard. France, meanwhile, formalized the preparation of custard within pastry through the codification of crème pâtissière, the foundational preparation of classical pastry work.
What distinguishes this recipe from the everyday variety is the combination of a true pâte sablée — richer and more tender than standard shortcrust — with a custard that sits between a set baked cream and a proper pastry cream in texture, giving it a more complex structure than either alone. Successfully combining this richer shortcrust with a custard that balances between baked cream and proper pastry cream textures unlocks one of pastry kitchens' most versatile and respected creations for the home baker.
Nutritional Information (per slice, approximate values)
| Nutrient | Amount |
|---|---|
| Calories | ~320 kcal |
| Protein | ~7 g |
| Carbohydrates | ~32 g |
| of which sugars | ~17 g |
| Fat | ~18 g |
| of which saturates | ~10 g |
| Fiber | ~0.5 g |
Frequently Asked Questions
Can I make this tart ahead of time?
The tart shell can be blind-baked up to two days in advance and stored at room temperature, loosely covered. The custard filling can be made a day ahead and kept covered with plastic wrap pressed directly against its surface — this prevents a skin from forming prematurely. Fill and bake the assembled tart the day you intend to serve it for the best texture. The finished, fully baked tart can be refrigerated for up to two days, though the pastry will soften slightly over time.
How should leftover tart be stored?
Once the tart has cooled completely and set in the refrigerator, cover it loosely with plastic wrap or store individual slices in an airtight container. It keeps well in the refrigerator for up to three days. Avoid freezing the assembled tart, as the custard tends to weep and separate on thawing. The unbaked pastry dough, however, freezes well for up to one month.
What variations or substitutions work well?
The vanilla bean can be replaced with two teaspoons of pure vanilla extract stirred in off the heat, or with a combination of vanilla and a half-teaspoon of almond extract for a subtle nuttiness. In spring, infusing the cream with fresh lemon zest or a few sprigs of fresh lavender (removed before filling) creates lighter, more seasonal variations. For a dairy-free adaptation, full-fat oat milk combined with coconut cream in a 2:1 ratio approximates the fat content and texture of the original — the custard will be slightly less rich but still well-structured. Cornstarch can be replaced with an equal weight of all-purpose flour, though the resulting custard will be slightly more opaque and less glossy.
Why did my custard crack on top?
Cracking is almost always caused by overbaking or by too high an oven temperature. The custard sets through gentle, even heat — once the internal temperature of the filling exceeds roughly 195°F (90°C), the proteins tighten and contract, pulling away from the shell and fracturing. Use an oven thermometer to verify your oven's true temperature, reduce the heat by 10–15°F if cracking persists, and pull the tart earlier than you think necessary. A cracked tart will still taste correct; the texture will simply be less silky at the center.
My pastry shrank during baking — what went wrong?
Shrinkage has two main causes: the dough was stretched rather than lifted when lining the pan (which creates tension that releases during baking), and it was not rested long enough before going into the oven. Always chill the lined shell for a minimum of 30 minutes before blind baking. Working with very cold butter throughout the dough-making process also reduces gluten development, which is the underlying mechanical cause of shrinkage. As a precaution, press the raw dough slightly above the rim of the pan — any minimal shrinkage will bring it back to the correct level.